AI Video Transitions: How They Work and How to Make Them Smooth
AI video transitions explained: how a model builds the bridge between two shots, which effects to use, how to prompt them, and how to time them to music.
An AI video transition is a short clip that a model generates to connect two shots. Instead of picking a dissolve or wipe from a menu, you give the model the last moment of one shot and the first moment of the next, add a line of text about the motion, and it invents the frames in between. The result can be a morph, a camera move through a doorway, or a whip pan that lands exactly on your next scene. You get the best results by controlling three things: the two endpoint images, a short prompt, and the timing against your audio. This guide covers all three, and shows how to build them in AiEnvoy’s AI Video Generator, where Sora, Kling and Veo models sit in one studio.
TL;DR
- An AI transition is generated, not applied: a model creates new frames that bridge a start image and an end image, guided by a short text description.
- Quality depends on your inputs. Clean, similar-composition endpoints and a prompt with one action and one camera move beat long, crowded prompts.
- Flicker and abrupt jumps are known failure modes of the technology, and you can reduce them with better endpoints, shorter bridges and a cutaway.
- Time the transition to the music: whooshes just before the beat, bigger effects on section changes, plain cuts on small beats.
- You can generate your clips, music and sound effects in one place instead of stitching together several tools.
Table of Contents
- What an AI video transition actually is
- How AI builds the in-between frames
- Types of AI transitions and when to use them
- How to create a smooth AI transition, step by step
- Fixing flicker, jumps and awkward endings
- Timing transitions to music and sound
- Choosing the right approach for your content
- Why one studio beats a pile of tools
- Build your transitions in AiEnvoy
- Our view: transitions are a workflow problem
- FAQ
- Sources
What an AI video transition actually is
A traditional transition is an effect applied to existing footage. A cross dissolve fades one clip into the next. A wipe slides one over the other. The editor does not create any new picture, it just changes how two existing pictures overlap.
An AI transition creates new picture. Research describes it as transition video generation: a model takes a first frame and a last frame, plus descriptive text, and produces the video that connects them. The 2025 paper Versatile Transition Generation frames it exactly this way, using image-to-video diffusion models. Diffusion models start from noise and gradually refine it into frames, which is why a single still can become a moving clip.
This is why AI transitions can do things a menu effect cannot. A character can walk through a door in a kitchen and step out onto a beach. A product can morph into its packaging. A city skyline at dusk can become the same skyline at dawn. The model works out what the in-between should look like.
For a creator or marketer, the practical difference is this:
| Classic editor transition | AI-generated transition | |
|---|---|---|
| What it does | Blends or moves existing frames | Generates new frames between two endpoints |
| Inputs | Two clips | Two frames (or clips), plus a text prompt |
| Creative range | A fixed menu of effects | Open-ended: morphs, camera moves, scene jumps |
| Main risk | Looks dated or overused | Flicker, odd morphing, abrupt endings |
| Best for | Clean, fast edits | Scene changes that need a visual idea |
How AI builds the in-between frames
You do not need the math, but a basic picture of the process helps you troubleshoot.
The model encodes your frames into a compressed internal representation, then denoises that representation step by step and decodes it back to video. According to the VTG paper, the video models use temporal convolutions and temporal attention so that each frame stays related to the frames around it. That is what gives motion its continuity.
The harder part is the ending. Most image-to-video models were built to start from one image and keep going. A transition has to arrive at a second image. Researchers at the University of Washington tackled this in Generative Inbetweening, adapting an image-to-video model so it predicts motion both forward from the first keyframe and backward from the last, then reconciles the two so the motion meets in the middle.
A second line of work, TVG, also conditions generation on both endpoints and uses the temporal relationships inside the video model to synthesize the frames between them, without extra training.
Two takeaways for your workflow:
- The model treats both endpoints as targets. If they are wildly different, the bridge has to do more work, and that is where odd morphing appears.
- Text steers the motion, not the destination. Your images fix where the clip starts and ends. Your prompt describes how it gets there.
Types of AI transitions and when to use them
Most AI transitions you will want fall into a handful of families. The names come from film editing, and you can use them directly in prompts.
Match cuts and morphs
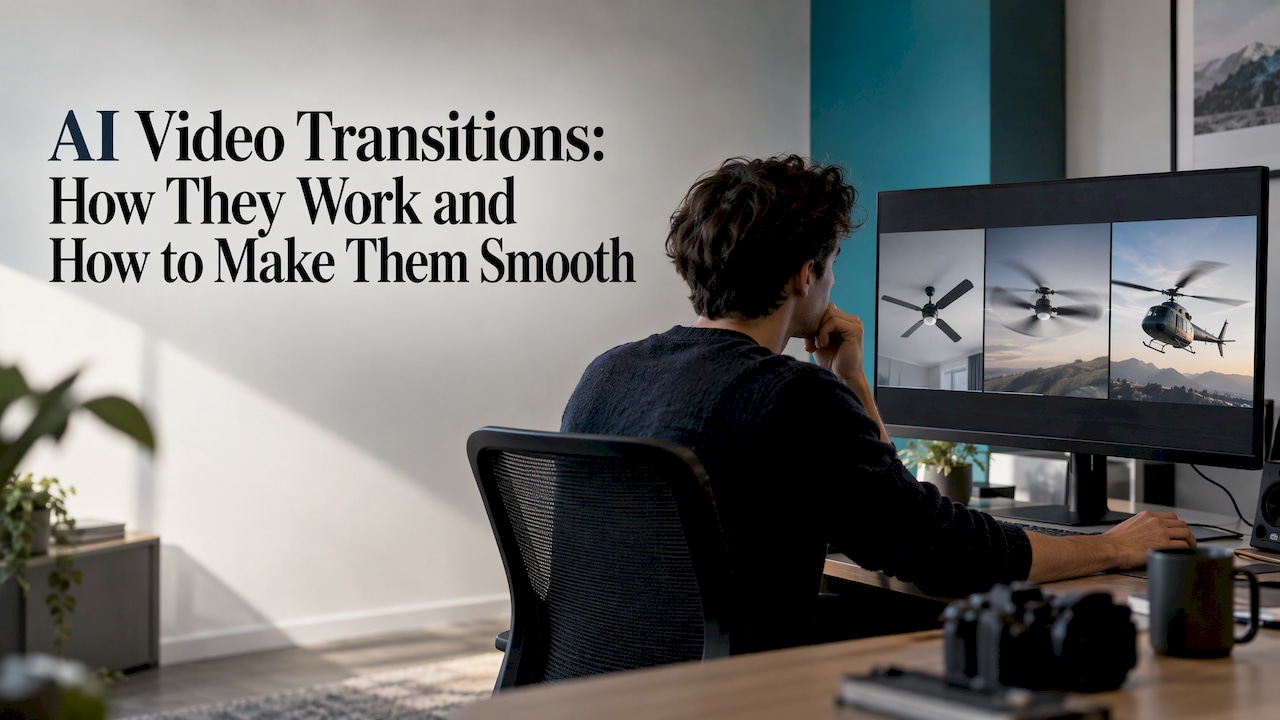
A match cut connects two scenes through a similar shape, color or movement: a spinning ceiling fan becomes a helicopter rotor, a coin flip becomes a moon. It suggests that two moments are linked, such as time passing or a transformation. AI is good at this because you can choose endpoint images that share a shape and let the model blend them. Use it for story beats, product reveals and “before and after” content.
Whip pans
A whip pan is a fast camera swing that blurs the frame and lands on a new scene. It signals urgency or a quick change of focus and lets you skip the connective tissue between two moments while keeping energy up. Add shake for action or handheld, documentary-style sequences. It suits short-form social video, where every second counts.
Object and camera pass-throughs
The camera moves through a doorway, a window, a tunnel or behind an object that wipes the frame, and emerges in a new place. These work well for travel content, real estate walk-throughs and tutorials that jump between locations. Choose endpoints where the opening and exit have similar framing, and the model has little to invent.
Zooms, light leaks and glitches
These are punchy accent effects. Use them sparingly, on the biggest moments of a video, such as a chorus, a reveal or a call to action. A video that glitches on every cut feels noisy by the fifth one.
Subject morphs
Person to person, product to product, outfit to outfit. These are the viral “everything transitions” format. They work best when the subject sits in the same position and scale at both endpoints, so the model only has to change appearance, not geometry.
How to create a smooth AI transition, step by step
Here is a repeatable workflow. It works whether you are bridging two generated clips, two photos or two frames from your own footage.
1. Plan the endpoints before you generate
Decide the last frame of Shot A and the first frame of Shot B. Write down what is in each and where the subject sits. If the subject is centered in one and in the lower corner in the other, expect the model to improvise a lot in between.
Image-to-video generation is strongly conditioned by the starting still, as this SitePoint explainer on image-to-video tools notes: a clean composition and a clear subject shape the clip you get. Cluttered backgrounds and several competing subjects give the model more ways to go wrong.
2. Make your endpoints match in the ways that matter
Aim to match:
- Framing: same shot size (wide, medium, close-up) or an intentional, motivated change.
- Lighting and color: similar direction and palette, unless the color change is the point.
- Subject position: the same place in the frame makes morphs far more believable.
- Style: one realistic, one cartoon will produce a messy middle.
If you need images that match your look, you can generate or restyle them first with the AI Image Generator so both endpoints share one visual style.
3. Write a short, specific prompt
The same SitePoint workflow recommends describing one clear action and one camera movement rather than listing many motions. For a transition, that translates to a formula:
Camera move + what the subject does + what changes in the environment.
Examples:
- “Fast whip pan to the right, motion blur, lands on a sunlit rooftop.”
- “Slow push-in through the open doorway, the room dissolves into a beach at golden hour.”
- “The camera follows the spinning coin, which becomes the full moon.”
Avoid stacking five effects in one sentence. If you want a spin, a zoom, a color shift and a glitch, you will get a muddle. Pick the one that carries the idea. For more on writing motion prompts for short loops, a free motion loop maker shows how a single clear motion instruction behaves on animated art.
4. Keep the bridge short
A transition is a punctuation mark, not a scene. One to three seconds is usually plenty for social video. The longer the model has to invent, the more chance it drifts. If a generated bridge feels long, trim it in your editor and keep only the strongest portion.
5. Generate several versions and pick one
Even with the same inputs, each generation differs. Make a few takes and choose the one where motion is natural and the arrival on the second shot is clean. Treat this as normal practice, not a sign that something is wrong.
6. Cut it into your timeline
Place the bridge between your two shots, and check the joins. The first and last frames of the bridge should match the shots on either side, so the cut in and out is invisible. If you see a small jump, trim a frame or two from the edge.
Fixing flicker, jumps and awkward endings
AI transitions fail in predictable ways. Knowing why helps you fix them.
Flicker between frames. The VTG researchers identify independently sampled noise as a source of frame-to-frame flicker, and propose interpolating the noise between the endpoints to reduce abrupt changes. You cannot change that inside a finished tool, but you can lower the risk: use endpoints with similar textures and lighting, and keep the bridge short so fewer frames can disagree.
An abrupt jump at the end. The TVG paper describes a problem it calls conditional image leakage, where the generated video stays too close to the first image for too long and then has to snap to the final one. If your transition sits on Shot A for most of its length and then lurches, make the prompt describe the change early, such as “begins turning immediately”, and choose endpoints that are closer in composition.
Two clips that will not connect. When the action in Shot A and Shot B has no visual link, no transition prompt will rescue it. Options that work:
- Insert a one to two second cutaway (a detail shot, a prop, a sky, a reaction) between the two. A short B-roll insert resets the viewer’s eye and hides the seam.
- Re-generate Shot B from a still that matches the last frame of Shot A, so the two clips are built to connect.
- Change the transition type. A hard cut or a whip pan is often better than a morph when the scenes have little in common.
A character who changes between shots. If the same person looks different before and after the transition, the problem is identity, not the transition. Reusable character profiles keep a face and outfit consistent across clips, which AiEnvoy offers as AI Characters.
Timing transitions to music and sound
A good transition feels intentional because it lands with the audio. A great one is invisible because the ear is busy.
Use these rules of thumb, which are standard editing practice:
- Whoosh a little early. Place the loudest point of a whoosh sound a few frames before the beat, so it resolves just as the new shot appears.
- Match weight to the moment. Put big effects such as zooms, glitches and light leaks on chorus entries, drops and section changes. Use plain cuts on smaller beats.
- Align to phrases, not just drums. Scene changes feel natural when they start with a musical phrase.
- Do not force everything to the beat. If someone is speaking, let dialogue or narration lead and move the accent instead.
Sound effects do much of the work of selling a transition. A swoosh, riser or impact tells the viewer that something big just happened, even if the visual change is subtle. Our guide to creating sound effects with AI covers how to make them for your videos. If you also need the track itself, the AI Music Generator lets you build the music and plan your transitions around its sections.
A simple sync map
Before you generate anything, list your scene changes against the music:
- Mark the beat or phrase where each new scene starts.
- Label the biggest moments (chorus, reveal, call to action) as your “hero” transitions.
- Assign an AI transition to hero moments only, and plain cuts to the rest.
- Keep each generated bridge under the length of the gap between marked beats.
This gives you three or four memorable transitions instead of twelve forgettable ones.
Choosing the right approach for your content
Different creators need different things from transitions.
| Your goal | Transition style | Prompt idea |
|---|---|---|
| Short-form social video | Whip pan, zoom, quick morph | “Fast whip pan left with motion blur” |
| Product marketing | Match cut or product morph | “Bottle rotates and becomes the packaging box” |
| Music video or lyric visual | Light leak, glitch on chorus, flowing morph | “Soft light leak, scene dissolves into neon street” |
| Tutorial or explainer | Simple push-in or cutaway | “Slow push-in through the screen into the next step” |
| Storytelling | Door or window pass-through | “Camera passes through the doorway into a new era” |
If you build many videos a week, set up a small “transition kit” of three effects you reuse. A consistent set makes your channel recognizable and speeds up production.
Why one studio beats a pile of tools
Most creators who try AI transitions end up juggling one tool for images, another for video, another for music and a fourth for sound effects. Every handoff means exporting, re-uploading and re-matching styles, and each one is a chance for the look of your video to drift.
That is the problem a single studio solves. When the stills, the clips, the voice, the music and the effects come from one place, you can keep your endpoints consistent, regenerate a weak bridge in minutes and keep the whole project in one library.
Build your transitions in AiEnvoy
AiEnvoy is an AI creative studio for video, music, images and voice. The AI Video Generator creates cinematic clips from text or images with models such as Sora, Kling and Veo, so you can generate both sides of a transition and the bridge in the same workspace. Add the soundtrack with the AI Music Generator, cut long footage into shorts with the AI Video Clipper, and keep your look consistent with templates and character profiles. The Free plan costs $0 per month, so you can try your first transition before choosing a paid plan. See all plans and token packs.
Developers who want to build this into their own product can use the Image-to-Video API or the Text-to-Video API.
Our view: transitions are a workflow problem
Most advice about AI transitions focuses on the clever prompt. In our experience of building a creative studio around video, music, images and voice, the prompt is only one part. The bigger gains come from the process around it.
Start from the story, not the effect. Decide why the scene changes, then choose the transition that explains it. A morph says “these things are connected”, a whip pan says “move on fast”.
Keep your assets in one place. When your stills, clips, characters and sound effects live in the same studio, your endpoints match, your style holds, and you spend your time choosing between good takes instead of fixing mismatched exports.
That is why we built AiEnvoy as an all-in-one studio with Sora, Kling and Veo models, automated workflows and reusable characters: so a marketer or creator with no editing background can ship a polished video in one sitting.
the author
FAQ
Are AI video transitions the same as the transitions in a video editor?
No. Editor transitions blend or move existing footage, such as a dissolve or a wipe. AI transitions generate new frames that bridge a start image and an end image, guided by a text prompt. This lets you create effects such as morphs and pass-throughs that no preset menu offers.
How long should an AI transition be?
For most social and marketing videos, one to three seconds is enough. Shorter bridges give the model fewer frames to get wrong, and they keep the pace up. If a generated clip runs longer, trim it to the strongest part.
What inputs give the smoothest result?
Two images with a similar composition, lighting, style and subject position, plus a prompt that describes one action and one camera movement. Clean, uncluttered stills help the model most, since the starting image strongly shapes the clip.
How do I match a transition to music?
Place the loudest part of a whoosh a few frames before the beat so it resolves as the new shot appears. Save your boldest effects for chorus entries and section changes, and use plain cuts on smaller beats.
Can I make transitions if I have no editing experience?
Yes. Generate or upload two images, write a one-sentence prompt for the motion, and generate a few versions. Pick the one that connects cleanly and drop it between your shots. The Free plan at $0 per month is enough to try the process.
Sources
- Versatile Transition Generation with Image-to-Video Diffusion
- Generative Inbetweening: Adapting Image-to-Video Models for Keyframe Interpolation
- TVG: A Training-free Transition Video Generation Method
- TVG on alphaXiv
- How AI Image-to-Image and Image-to-Video Tools Work (SitePoint)
Recommended
Put this workflow into practice with AiEnvoy
Create videos, AI music, and multi-language dubbing with Sora, Kling, Veo, and Seedance 2.5 — or connect our Developer APIs.