AI Image Outpainting: Extend Images Without Visible Seams
Learn how AI image outpainting works, how to expand backgrounds, fix distortions and sharpen results, then turn the extended image into video.
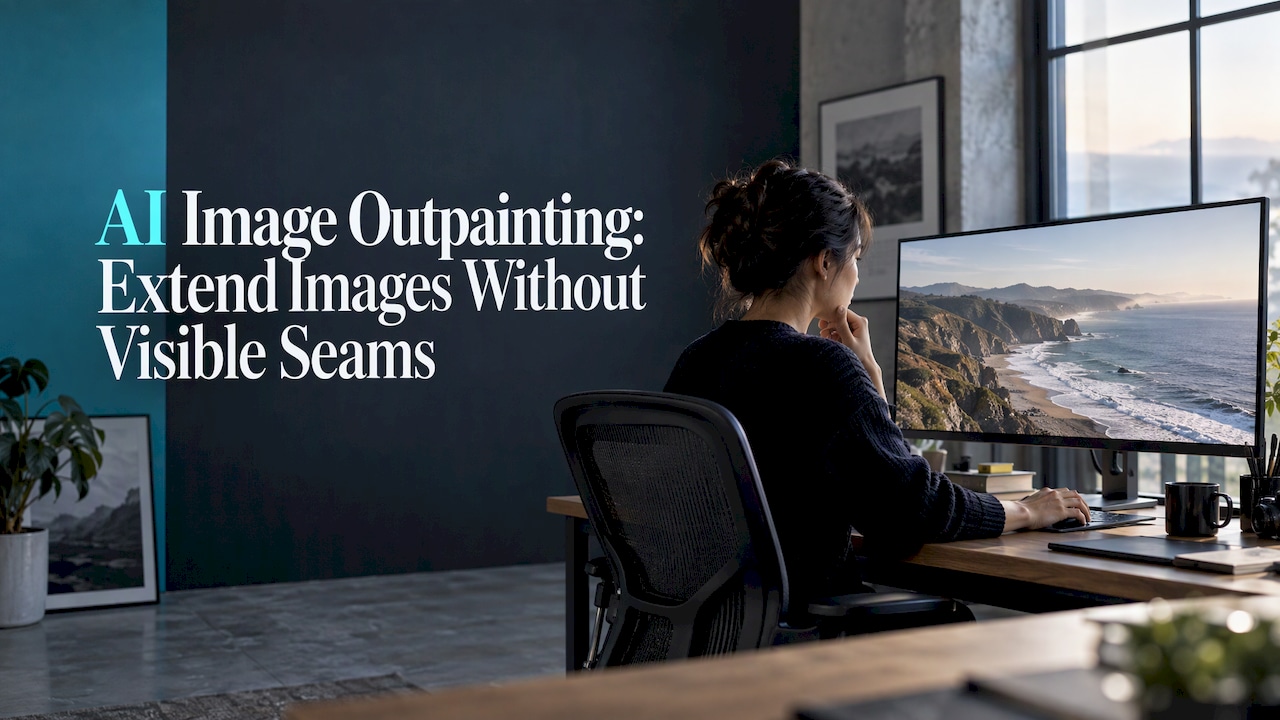
AI image outpainting extends a picture past its original edges by generating new pixels that continue the scene. Done well, a square product shot becomes a wide banner and a tight portrait gains sky, with no one able to tell where the original ends. Done badly, you get a visible seam, a drifting color, or a stray extra head. The difference comes down to four things: how much you extend, how you describe the new area, how softly you blend the edge, and how you finish the image. This guide covers all four, in the order you will use them, and shows where the extended image goes next: into video, where AiEnvoy picks up.
TL;DR
- Outpainting fills a masked area outside your image with new content while keeping the original pixels untouched.
- Extend away from the subject, in modest steps, and describe the whole scene in your prompt, not just the new part.
- Blur the mask edge and keep the same model, style words and lighting to avoid seams and color drift.
- Fix distortions with a targeted second pass on the problem area, then match grain, contrast and color across the whole frame.
- Once the frame is the right shape, you can animate it or build a campaign set from it in one studio.
Table of Contents
- What AI image outpainting actually does
- Where outpainting works well and where it does not
- A step-by-step outpainting workflow
- Expanding backgrounds and changing aspect ratios
- Fixing AI image distortions after outpainting
- How to improve and enhance AI images before and after outpainting
- From a finished frame to finished content
- Take your extended image further with AiEnvoy
- FAQ
- Sources
What AI image outpainting actually does
Outpainting is the opposite of cropping. Instead of removing the edges, you add canvas and let a generative model invent what would plausibly sit there. The model looks at what is already in the picture (horizon line, light direction, texture, palette) and paints a continuation.
The technical description is simple. In the open-source Diffusers library, outpainting fills the area outside the original image with new visual elements, while a mask marks the white outside area to be generated and the black inside area to be preserved. That mask idea matters for everything that follows. Whatever tool you use, whether a web app, a design program or a code pipeline, there is a protected region and a generated region, and the quality of your result depends on how those two meet.
For content teams, the practical uses are easy to name:
- Aspect ratio changes. One image has to work as a vertical story, a square feed post and a wide video thumbnail.
- Breathing room for text. Ads and covers often need empty space for a headline or logo.
- Rescuing a tight crop. A photo cropped too closely at the shoot gets its missing sky, floor or wall back.
- Background expansion. A studio backdrop or landscape grows to fit a new layout.
Where outpainting works well and where it does not
Not every extension is equally easy. The model is best at continuing things that have a natural, repeatable structure.
Reporting on Photoshop’s AI crop-based expansion found that it handles sky extensions, simple environmental backgrounds and studio negative space reliably. The rule of thumb designers have adopted is to expand away from the subject, not around it, because pushing a portrait out into a busy street scene produces obviously synthetic results.
That gives you a quick triage before you start:
| Extension type | Difficulty | Why |
|---|---|---|
| Sky, clouds, gradients | Easy | Soft, low-detail, forgiving |
| Studio backdrop or negative space | Easy | Mostly flat color and gentle falloff |
| Grass, water, sand, foliage texture | Moderate | Texture must match scale and grain |
| Interiors with walls and floors | Moderate | Perspective lines must continue correctly |
| Crowds, streets, busy scenes | Hard | Many objects, people and signs to invent |
| Extending around a face or hands | Hard | Anatomy errors show immediately |
If your layout allows it, choose the direction that adds the simplest content. A subject on the left of a frame can often be given a wider canvas on the right, where there is only background, instead of being extended on all four sides.
A step-by-step outpainting workflow
This routine works in any tool, from a one-click web extender to a node-based pipeline.
1. Start from the best source image you have
Outpainting inherits the quality of its input. A soft, noisy or heavily compressed source gives the model poor information to continue. Use the original file rather than a screenshot or a social-media download, and save intermediate versions as PNG so they are not recompressed each time.
Resolution matters too. The Diffusers documentation notes that SDXL models work best with 1024×1024 images, so if you are running that kind of model yourself, work near that size and upscale at the end rather than generating huge canvases in one go.
2. Choose the target shape first
Decide the final ratio before you extend: 16:9 for video, 9:16 for vertical, 1:1 or 4:5 for feeds. Working backward from the ratio tells you which sides need new canvas and by how much. If you need several ratios, extend the background generously in the direction that allows it, then crop to each ratio afterward. One well-extended master image is easier to manage than five separate generations.
3. Extend in steps, not one jump
The farther the model has to invent from the original, the less it has to anchor to. A small extension of a textured background is usually indistinguishable from the original. A very large one, such as tripling the width, produces an image that is mostly generated. Extend a moderate amount, check it, then extend again from the result if you need more. Stop when the new area outweighs the original, because at that point you are no longer extending a photo but creating a new one.
4. Keep a strip of the original inside the generated zone
Give the model some context. Letting the selection overlap a little of the existing edge means the generator sees what it needs to match: the line of the horizon, the direction of the shadows, the grain. Most tools do this automatically; if yours has a manual selection, include a thin band of the original image.
5. Describe the whole scene
Prompt for the scene, not just the empty area. “Sandy beach at golden hour, calm sea, soft haze, wide shot” gives the model the same vocabulary the original image has. Use the same style words and, where you can choose, the same model that made the original, so color and rendering do not drift. If extra people or objects keep showing up in the new area, remove person-related words from the prompt.
6. Blend the seam
A hard mask edge is the most common cause of a visible line. The Diffusers guide recommends blurring the mask (its example uses a blur factor of 20) so the original and generated regions transition naturally. In design tools this is called feathering. If you can grow the mask by a few pixels before feathering, the soft ramp lands in the generated area instead of eating into your subject.
7. Finish the whole image
The extended region almost never matches perfectly in grain, contrast or color. Treat the whole frame as one image at the end: match the black point, add consistent grain or sharpening across everything, and apply the same vignette or color grade over the full canvas. This single step hides more seams than any other.
Expanding backgrounds and changing aspect ratios
Background expansion is the most common reason marketers reach for outpainting, so a few specifics help.
Product shots. Keep the product inside the protected area and extend only the backdrop. Ask for the same surface, same lighting direction and same softness of shadow. A product casting a shadow to the right should have the new canvas on the right continue that shadow, so check that edge first.
Portraits and creators. Extend upward for headroom or sideways for negative space where the text will sit. Avoid asking the model to invent the rest of a body unless the pose is simple, because torso, arms and hands are where errors show.
Thumbnails and banners. Extend horizontally into background areas, then place the subject using the rule of thirds. A subject pushed to one side with a clean extended field on the other is also the layout that ad copy and captions prefer.
Multi-ratio kits. Build the widest, tallest master first, then crop for each placement. Check each crop at the size it will actually be displayed, since a seam invisible on a laptop can show in a full-screen story.
Fixing AI image distortions after outpainting
When outpainting goes wrong, the problems fall into a few recognizable groups, each with a standard fix.
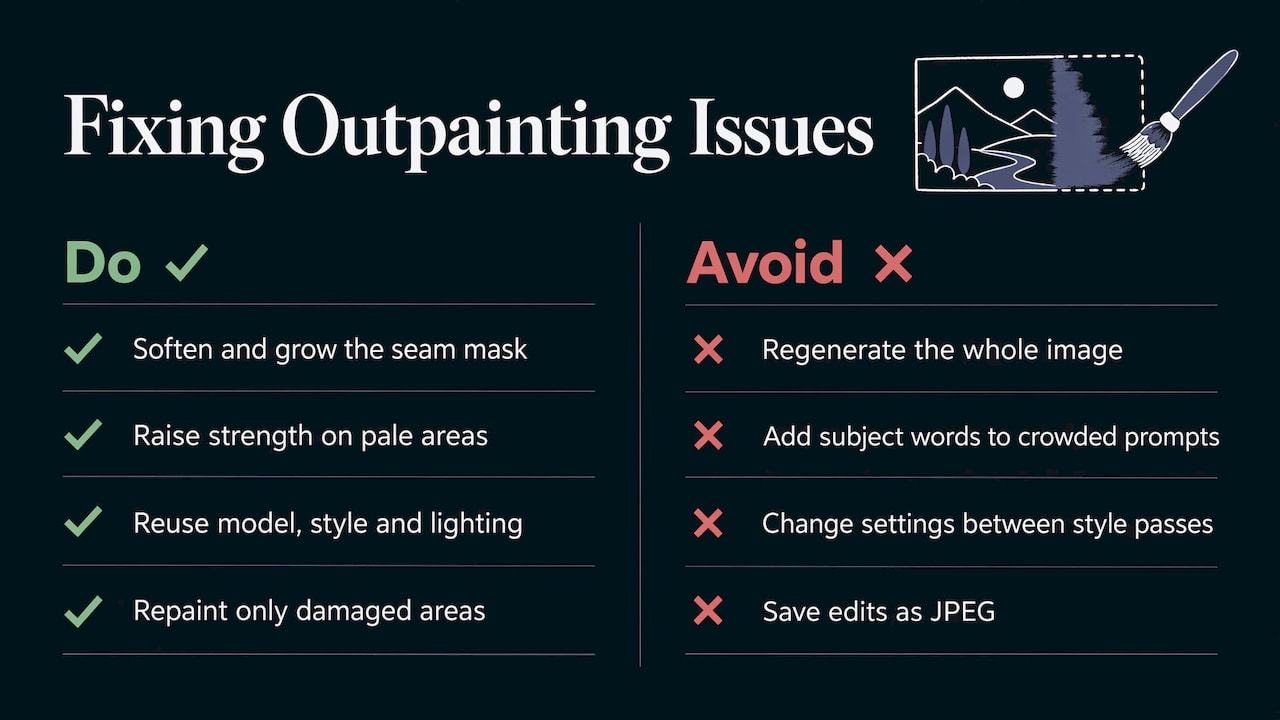
Visible seams or a bright line at the border. The cause is almost always a hard mask or mismatched exposure. Re-run with a softer, slightly grown mask, then brighten or darken the fill so it matches. A curves or levels adjustment on the generated layer is usually enough.
Washed-out or whitish new area. If the empty canvas stays pale, the model was not given enough freedom to generate. Raise the strength of the generation on the new area, then lower it for a second pass along only the seam to blend it.
Style or color drift. The new region looks like it was made by a different artist. Use the same model, the same style words and the same lighting terms as the original. Where you can, work in one session so the settings stay constant.
Extra people, objects or duplicated subjects. The model is trying to fill space with what the prompt suggests. Shorten the prompt, remove subject words, or specify an empty setting. Smaller extension steps also reduce this, because there is less room to invent.
Broken hands, faces and bodies. Do not regenerate the whole image. Mask just the damaged area and repaint it at a higher resolution or with a more focused prompt. The local fix keeps everything that was good.
Changes outside the mask. Some inpainting models are trained to create a smooth transition, so they can alter pixels you wanted untouched. The safest habit is to paste the original pixels back over the result using the mask, and to save as PNG so JPEG compression does not add its own artifacts.
Underneath all of these is one idea. Every mask-based edit encodes the picture, adds controlled noise in the area you chose and denoises it again guided by your prompt. The mask decides where change is allowed and the strength setting decides how much. If you remember only that, you can diagnose most problems: too much change means lower the strength, too little means raise it, and anything wrong at the border means fix the mask.
How to improve and enhance AI images before and after outpainting
Before you extend, clean up the source. Remove obvious artifacts, fix a tilted horizon and make sure the exposure is even. A flaw in the original gets repeated in the extension.
After you extend, a two-stage approach gives the cleanest result. The Diffusers guide describes generating an initial outpaint and then running a second inpainting pass with a quality-focused model to produce the final image, and it suggests a depth estimator to keep new content consistent with the original scene’s geometry. You do not need code to apply the principle: generate the extension quickly, then refine it with a lower-strength pass that improves detail without changing the composition.
A checklist for the finishing pass:
- Compare the original and extended zones at 100% zoom, looking for grain, sharpness and color differences.
- Match brightness and contrast with a gentle adjustment on the new area.
- Apply a light, low-strength harmonizing pass over the join if the texture still feels different.
- Add uniform grain or sharpening to the whole frame.
- Upscale last, not first, so you are enhancing the final composition once.
- Export as PNG for further editing, and as high-quality JPEG or WebP only for delivery.
From a finished frame to finished content
For most marketers and social media managers, the extended image is not the end product. It is the starting point for a campaign: a hero image, a set of ratios, a motion version. That is where a single studio saves time over a chain of separate apps.
Once the canvas is the right shape, you can restyle it, build variations in different artistic styles with image-to-image transformation, and animate it into a short clip. A wide, clean background is especially good as a video starting frame, because there is room for camera movement and text overlays. Planning the extension with that in mind (empty space where the motion or captions will go) makes the next step easier.
Here is a simple pipeline many content teams use:
- Extend or restyle the key image to the master ratio.
- Make style variants for different channels.
- Animate the strongest versions into short clips.
- Add a voiceover or dub into other languages for each market.
- Schedule the set.
AiEnvoy covers the later steps in that list under one roof: image generation and transformation, video generation, dubbing and scheduled automated creation.
What we think about outpainting
We see outpainting as one step in a content workflow, not a goal on its own. Nobody wants a wider image for its own sake. They want the right shape for a placement, and then they want that image to become a post, a clip or an ad.
That is why we built AiEnvoy as a single studio for video, music, images and voice. It brings models such as Sora, Kling and Veo into one interface, so a creator without professional training can move from a still to a cinematic video without exporting files between five tools. Reusable AI character profiles keep a face or a mascot consistent from image to image, and the template library and asset management keep campaigns organized.
Our view is simple: the time you save is not in any one edit, it is in not having to repeat setup, exports and style matching at every handoff. The best outpainting habits (soft masks, small steps, consistent style words) apply just as much when you carry an image into video, and an all-in-one studio makes those habits easy to keep.
the author
Take your extended image further with AiEnvoy
If your goal is a finished campaign and not just a wider picture, AiEnvoy gives you the tools to carry an image through to video, voice and scheduling. The AI Image Generator transforms images across artistic styles, the AI Video Generator creates cinematic video from text or images, and AI Characters keep your subjects consistent across assets.
There is a Free plan at $0 per month, so you can start with your own images and see the workflow. See the plans and token packs or browse all studio features.
FAQ
What is the difference between outpainting and inpainting?
Inpainting changes or repairs an area inside an image, while outpainting adds new area outside its borders. Both use the same mask-and-generate idea, which is why the fixes overlap: soft mask edges, controlled strength and matching style words help in either case.
How far can I extend an image before it looks fake?
Small extensions of simple backgrounds are the safest. As a rule, extend in several moderate steps and stop when the new area becomes larger than the original, because past that point the result is mostly generated. Extending away from the subject is more reliable than extending around it.
How do I get rid of the visible line where the new area starts?
Soften the mask edge, include a thin band of the original in the generated selection, and match brightness and color on the new area. Then apply grain, contrast and color grading across the whole image so both parts share the same finish.
Can I fix distorted hands or faces that appear in the extended area?
Yes. Mask only the damaged region and regenerate it with a focused prompt, ideally at a higher resolution. Keep the rest of the image as it is, and paste the original pixels back over everything outside your mask.
Can I turn an outpainted image into a video?
Yes. A wide, clean extension makes an excellent first frame for an image-to-video clip, since it leaves room for camera motion and text. In AiEnvoy, the AI Video Generator creates video from images or text.
Sources
- Outpainting, Hugging Face Diffusers documentation
- Photoshop in 2026: The Biggest AI Features That Actually Changed Design Workflows, PhotoshopNews
Recommended
Put this workflow into practice with AiEnvoy
Create videos, AI music, and multi-language dubbing with Sora, Kling, Veo, and Seedance 2.5 — or connect our Developer APIs.